As I mentioned when I shared my fun Egg & Cress Tortilla Cups recipe last week, this month I have been working with My Fairy Garden, who commissioned me to create three fun new recipes to complement their brand new Fairy Garden kit - the Fairy Kitchen Garden. Today I'm sharing the second recipe - for a cute little garden themed mini side salad for kids.

This recipe was created with pea shoots that we grew in our Fairy Kitchen Garden. Initially my 5 year old was unsure about trying pea shoots, but he was so excited after growing them himself that he gave them a go and surprised himself (and me!) by actually enjoying them.
You can watch my quick demo video below to see my 5 year old planting his pea shoot seeds. Click here to watch it on YouTube if you have any trouble loading the video below.
I don't know about your kids, but mine have never been very enthusiastic about any form of salad leaves. Creating their very own tiny salad bowl is a great way to encourage them to give them a try without overwhelming them with a huge pile of green stuff!
Sweet and mild pea shoots make a lovely alternative to traditional lettuce too, and adding vegetable flowers and a cheese ladybug makes them extra fun and more attractive to little ones!

If you're looking for healthy party food ideas for a garden or fairy themed party, these individual portions of cute mini salads would look lovely on any party food table and make a great accompaniment to sandwiches or my fun flower shaped egg & cress mini tortilla cups!

Garden Themed Mini Side Salad for Kids
Ingredients (makes 1):
- handful fresh pea shoots
- 3-4 slices raw carrot
- 2 slices cucumber
- 1 mini Babybel cheese
Method:
Harvest the pea shoots from your Fairy Kitchen Garden by cutting near the base of the stem with kitchen scissors.
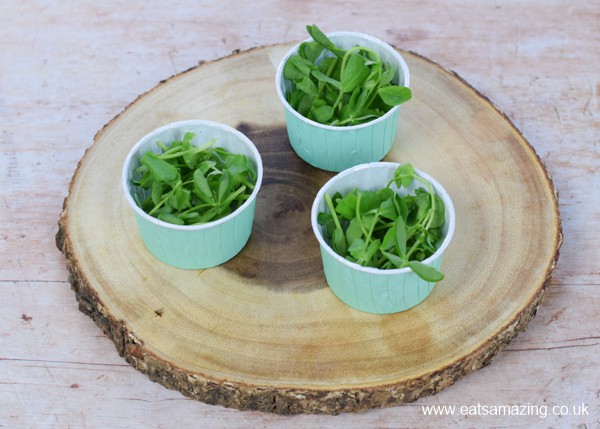
Place the pea shoots into a cardboard muffin cup or small bowl.

Using mini bento cutters, cut flower shapes from the carrot & cucumber slices.

Add the carrot and cucumber flowers to the pea shoots, arranging them on top to look like growing flowers.

Make the Babybel ladybird. Start by removing the outer wrapper from the cheese, leaving the wax layer intact.
Using a small round cutter, cut a semicircle from one side of the wax for the head, then remove the wax, leaving the cheese intact.

Cut a sharp triangle from the wax, point side towards the semi-circle you just removed. This will form the wings.

Using a tiny round cutter or the end of a drinking straw, cut dots from the wax and remove.

Add two of the wax dots back onto the cheese in the head area to form the eyes.

Pop the cheese ladybird on top of the salad to decorate, then serve immediately.

Enjoy!
If you liked this recipe, why not try the other two recipes I created to complement the Fairy Kitchen Garden kit - my fun Egg & Cress Mini Tortilla Cups or my lovely Rice Cake Fairy Faces!

For more information and updates on all of the My Fairy Garden products, why not follow My Fairy Garden on Twitter, Facebook or Instagram, or check out their website here.
Fairy Kitchen Garden is available now from toy retailers including Argos, Smyths and Hobbycraft.
Grace
Disclosure: This recipe and blog post was commissioned by Interplay to support the launch of Fairy Kitchen Garden. I received Fairy Kitchen Garden products to try and was compensated for my time and the cost of ingredients, however all opinions expressed in this post are my own.
Garden Themed Mini Side Salad for Kids
Ingredients
- handful fresh pea shoots
- 3-4 slices raw carrot
- 2 slices cucumber
- 1 mini Babybel cheese
Instructions
- Harvest the pea shoots from your fairy garden by cutting near the base of the stem with kitchen scissors.
- Place the pea shoots into a cardboard muffin cup or small bowl.
- Using mini bento cutters, cut flower shapes from the carrot & cucumber slices.
- Add the carrot and cucumber flowers to the pea shoots, arranging them on top to look like growing flowers.
- Make the Babybel ladybird. Start by removing the outer wrapper from the cheese, leaving the wax layer intact.
- Using a small round cutter, cut a semicircle from one side of the wax for the head, then remove the wax, leaving the cheese intact.
- Cut a sharp triangle from the wax, point side towards the semi-circle you just removed. This will form the wings.
- Using a tiny round cutter or the end of a drinking straw, cut dots from the wax and remove.
- Add two of the wax dots back onto the cheese in the head area to form the eyes.
- Pop the cheese ladybird on top of the salad to decorate, then serve immediately.
Love this cute salad recipe? Why not save it to Pinterest so you can easily find it again!


Fiona Manoon says
It looks very yummy.
Thanks for sharing such a delicious recipe with us.