I've probably mentioned before that I make most of my own bread by hand. I started making bread in a bread machine using organic flour from trusted suppliers after hearing about the amount of hidden ingredients in supermarket breads and flour (for more information read this article from the Real Bread Campaign), so that I could have control over the ingredients. I soon progressed to making bread by hand after a few lessons from my Mum, who is a fantastic baker (her bread has to be tasted to be believed!). I now make a batch of ⅘ loaves at a time, and freeze most of them to use as and when we need them. I make mostly loaves and bread rolls, and I'm hoping to one day make all of my bread products by hand, like pitta breads, naan bread, English muffins and bagels etc. Watch this space for my future experiments in that area!
I've had a few people ask what recipe I use for making bread, so I thought I'd give you a rough guide to the method I use. When it comes to making bread, everyone has their own way of doing things; this is what works for me. Feel free to adapt and alter to suit your own needs. When I make a large batch of bread I triple or quadruple the amounts in the recipe below.
Ingredients:
500g Organic Strong Bread Flour
1 tsp Yeast (I use Doves Farm Quick Yeast)
1 tsp Sugar
¾ tsp Salt (I use crushed Sea Salt Flakes)
325ml Warm Water
1 Tbs Olive Oil
Semolina for dusting oven tray (if not using a loaf tin)
Note: You can use whatever flour you prefer; I use different organic flours (white, wholemeal, seeded etc) in various combinations according to my mood. I often add extras such as oats or seeds, adding them in as I weigh out the flour so that the total still comes to 500g.
I almost always start my bread off the night before I intend to bake it, using what is known as the 'sponge' method. This step is entirely optional, but I find it gives my bread much more flavour, and makes it a lot easier to knead in the morning.
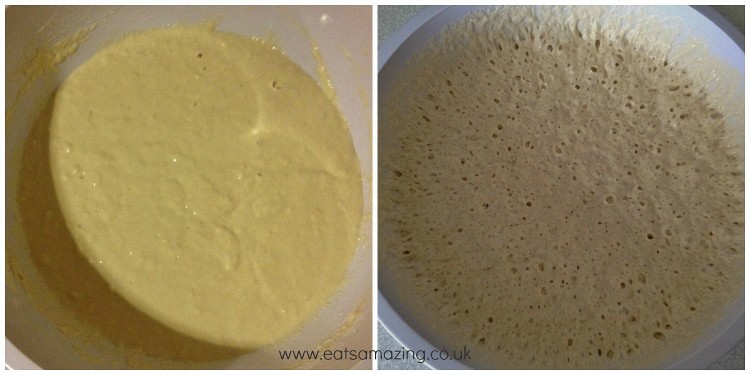
If you are using the sponge method, place half the flour, all of the yeast, all of the sugar and all of the water into a large bowl. Mix together to a batter-like consistency, then cover the bowl with clingfilm and leave to ferment over night. The sponge should be kept at room temperature, not in the fridge. Here is the sponge from my last batch of bread; when first mixed and the next morning.
When you are ready to start baking the next day, add the rest of the flour and all of the salt to the sponge, and mix roughly together. Add the olive oil, then mix together until it forms a dough. It may be very sticky at this stage, but there's no need to add any extra flour at this point. If you are not using the sponge method, you can just mix all of the ingredients together at this point.
Tip out onto a clean work surface, scraping all the dough out of the bowl, and start kneading (if you aren't sure about how to knead bread, run a quick search on Google or YouTube - there are plenty of videos demonstrating kneading techniques out there). I find that if it is particularly sticky at this stage, I have to start by pulling it backwards and forwards rather than kneading normally, the aim being to stretch the dough. Keep at it, and eventually the dough will get less sticky and more elastic. Knead the dough for around 10 minutes, until it is smooth and springs back to the touch. If it is still very sticky, add a little more flour and knead for a minute or two longer.
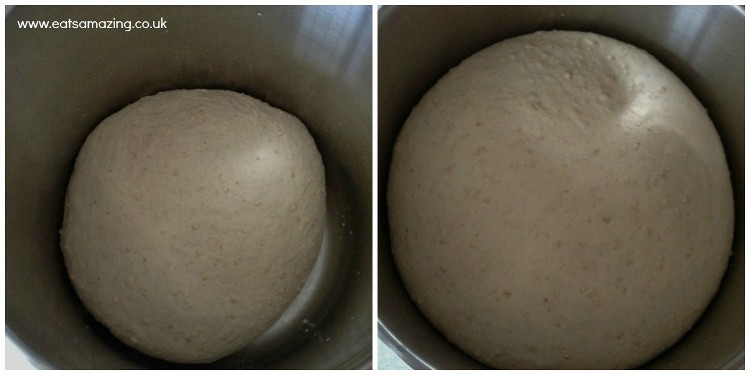
Once you have finished kneading, oil a large bowl or pan (I use my biggest stockpot for large batches) and place the dough inside. Cover and leave to rise until it has doubled in size. This usually takes up to an hour depending on the temperature of the room but can take longer. I find that when I use the sponge method the dough rises a lot quicker. Here is my last batch of bread before & after rising:
Once the dough has doubled in size, knead it gently a couple of times to knock it back then divide it up or shape into one large loaf. Place into an oiled loaf tin or floured proving basket, loosely cover and leave to rise again. I use both loaf tins and proving baskets for my bread. Proving baskets are great for shaping the bread if not using a tin, but not essential. You could improvise using a bowl and a floured clean tea-towel, or simply shape by hand straight onto a baking tray.
Once your loaf is rising well, preheat your oven to its maximum temperature. I add a shallow baking tray to the bottom of the oven, filled with boiling water, which creates steam to aid the bread rising (steam slows down the hardening of the crust, which allows the bread more time to rise before the crust is formed). I also spray my loaves with a little cold water before putting them in the oven, again this helps them to rise a little more.
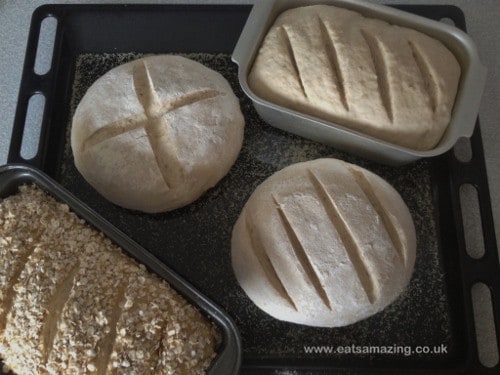
If using a proving basket, tip your loaf out onto a baking tray dusted with semolina. If you don't have semolina, you could oil your tray instead. Slash the loaf a couple of times with your sharpest knife, then spray your loaf with a little water to moisten the surface (optional). Here is my last batch of bread before going into the oven. I was experimenting with toppings on one loaf - it was glazed with warm honey & sprinkled with oats. The dough for these loaves was made with organic white flour with a couple of handfuls of oats added to the mix, and the ingredient amounts were triple the recipe above.
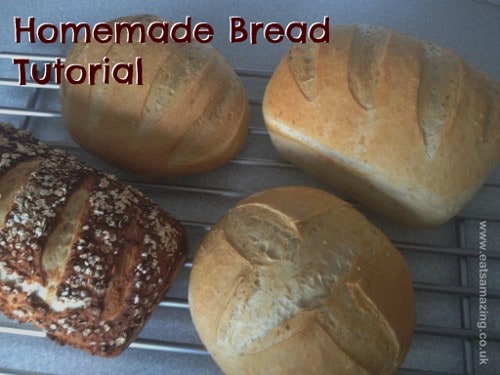
Once your oven has reached its maximum temperature, pop your loaf in the oven. Cook for 10 minutes at full heat, then turn down to 180°C (350°F/gas mark 4) and bake for ½ hour longer, keeping an eye on it to check it doesn't burn. Tip out from the tin or lift from the baking tray and cool on a wire rack. Once completely cool, bread can be popped in a plastic bag & frozen until ready to use. For the record, the honey/oat topping was delicious!
This recipe can also be used to make bread rolls or loaves shaped however you like; just shape the dough after the first rising to suit your needs. Do let me know if you try out this recipe - I'd love to see any photos of your baking efforts!
Grace


Mamabelly says
Love this tutorial! Thanks for sharing!
Grace Hall says
Thanks, glad you enjoyed it!
Sylke says
Yummy bread - I've tried it! 🙂
Grace Hall says
Thanks Sylke! 🙂
Chris Young says
Great stuff! Next time, have a go without the flour and oil - both have their functions but technically not needed, so just add extra unnecessary calories to your loaf. Also, try either fresh yeast or dried active yeast as quick/instant/fast acting yeast contains unecessary artificial additives.
Happy baking!
Grace Hall says
Hi Chris, thanks for your comments. I realise that the sugar & oil are not essential, I suppose I've become a creaure of habit with my standard recipe. I hope with time to start experimenting with 'slower' breads such as sourdough, but I've found this easy recipe a good easy starting point to get into the bread-making habit. I'll definitely try different yeasts too. I appreciate your feedback, and I have a feeling my bread journey is just beginning!
Chris Young says
Sorry I meant 'without sugar and oil', not without flour...doh!
Kathy says
I enjoyed reading your complete description of the process. Your loaves look gorgeous and I am sure are delicious. I also make bread. Not long ago I tried making English muffins - http://eclecticlamb.com/2013/01/28/homemade-english-muffins/
Grace Hall says
Thanks Kathy, and for the link to your English Muffins - they're pretty high up on my 'to-try' list!
May Chu says
I love your tutorial and all the photos that came with it..
Thanks for sharing
Grace says
Thanks May, hope you found it helpful!
Michelle says
Whenever I slash my bread (knife is sharp) is kind of deflates - is this ok or am I doing something wrong!
Grace says
Hi Michelle, it will deflate a little, if it deflates a lot, it may have been left to prove for a little too long. You could try leaving it to prove for a shorter time and seeing how that goes?