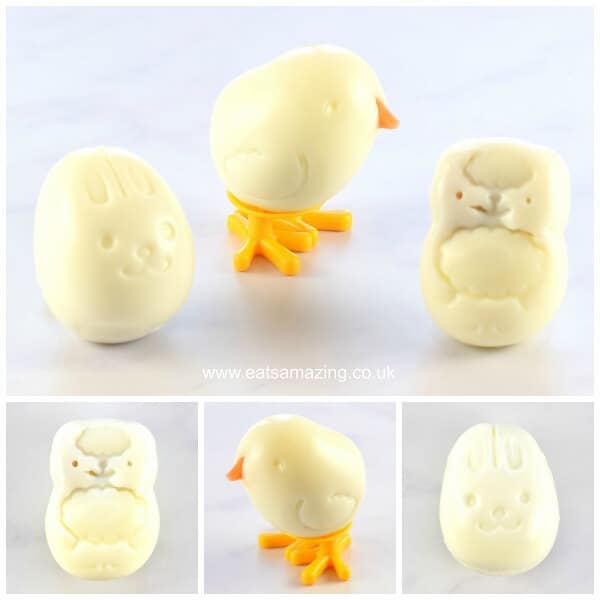
How to use egg moulds to make fun animal shaped hard boiled eggs, with video tutorial, top tips and step by step instructions.
Have you ever tried using egg moulds? They are one of the most easy ways I know to make fun food and I've found over the years that shaped boiled eggs never cease to amaze people!
Following on from my cute boiled egg animal tutorials, today I'm sharing my complete step by step guide for how to use egg moulds. As well as a video tutorial, I've also written out step by step instructions for different types of egg moulds, and shared all my trouble-shooting tips too!
As Easter is approaching, now is the perfect time to try using egg moulds, as they are a great easy tool to help you create a fun and healthy Easter breakfast or cute Easter themed packed lunch that is sure to impress your kids!
If you have any trouble loading the egg mould tutorial video above, click here to watch it on YouTube, and don’t forget to subscribe to the Eats Amazing YouTube channel while you are there for lots more easy recipes, tutorials and fun food ideas. You’ll also find full written instructions below.
How to Use Egg Moulds
I hope this tutorial will help you to get the best results from your egg moulds, as I did go through a bit of trial and error to get them right when I first started using them! They are really easy to use, but the video above and hints and tips I've shared below should make the process even easier for you.

The first thing you need to think about is the size of your egg. There are quite a few different egg mould designs available now and they do vary slightly in size. I usually use a UK large sized organic free-range egg; you may need to experiment with sizes depending on where you get your eggs from. I found that a medium egg was slightly too small for most moulds, so the design didn't imprint so well.
Once you've chosen your egg, you need to hard boil it. Place the egg in cold water and bring it to the boil on the hob.
As the water starts to heat up and get to boiling point, stir the water so that the egg spins (being careful not to crack the egg). This is to centre the yolk, which makes the finished egg less likely to crack or split when being moulded.
Continue to spin it for the first minute or so of boiling. Boil for 8 minutes.
As soon as the egg is cooked, carefully tip the hot water out of the pan and replace it with cold water. Quickly peel the egg whilst it is still hot, dipping it in and out of the cold water as you do so to avoid burning your fingers.

(NOTE: If cooking multiple eggs to be moulded, don't worry too much about the spinning step as it's tricky to do with more than one egg in the pan. The spinning makes it more likely that the egg will come out perfectly but it isn't essential).
Dip the egg mould in cold water to help avoid sticking. Place the egg in the bottom half of the mould whilst it is still hot.
Pop the lid on, and press down gently to mould the egg. Gradually increase the pressure, pushing the two parts of the mould together firmly. Clip the mould closed.
Place the mould into a large bowl of cold water and leave for 5-10 minutes to cool completely. If making the night before, you can also pop the mould into the fridge to set and stay cool overnight.

Once the egg has completely cooled, open the mould up. The egg should be shaped to the mould and have any design features of the mould firmly imprinted onto it.
If your egg was on the large side you may find that some of the egg has squished outwards from the mould. Don't panic! This is quite common and easily solved. Simply trim the excess egg from around the shape with the tip of a small sharp knife as shown in the video above and discard the trimmings.
The egg should pop easily out of the mould, ready to be served or packed in a lunch box.

Variations:
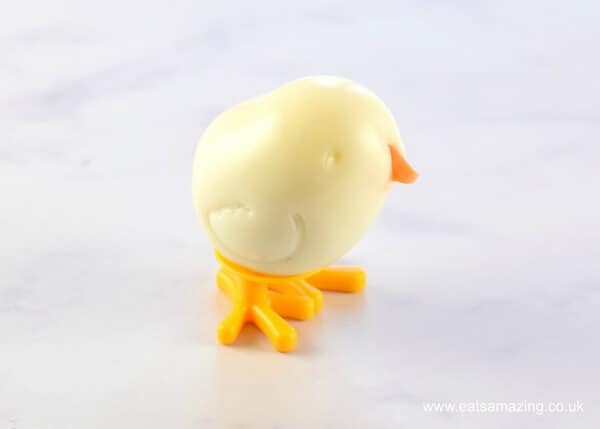
The Chick egg mould I used in the video above comes with a couple of sets of add-on legs - simply add them to the bottom of the egg before serving.
You may also find that your egg is slightly too small for this mould so the delicate beak doesn't imprint well, in which case it is easy to add a beak with a small triangle of carrot or cheese - just cut a slit into the egg where the beak should be and push the triangle of carrot or cheese to make your own edible beak.

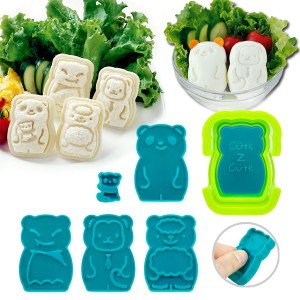
The CuteZCute Animal Palz egg mould set is also of a slightly different design - this is actually my favourite mould because I find it's even easier to use than the tradtional clip moulds.
To make an animal egg using the CuteZCute Animal Palz set, simple place the base plate into the mould, gently push the egg into the mould with the wider end of the egg at the head end, then push your chosen animal stamp firmly but carefully on top. Carefully slide the filled mould into the outer frame of the mould to hold it in place until the egg is ready.
Place in the bowl of cold water to cool as before.

I was reminded when I was updating this post how much my son has always loved his funny shaped eggs - he used to tease his friends at school by telling them that they were laid in that shape by special hens!
You'll find a great selection of egg moulds over in the Eats Amazing Shop, I hope you enjoy them as much as we do!
For more delicious and fun food ideas for Easter, check out the Fun Easter Food section here on the Eats Amazing blog or pop over and follow my Easter Pinterest boards for lots more fun ideas from around the web; Healthy Easter Food and Easter.
Grace
If you found this food tutorial useful, why not save it to Pinterest so you can easily find it again!


Jackie says
Never thought about centring the yolk - great tip!
Grace says
Thanks Jackie, I saw it mentioned somewhere ages ago, and so have always done it that way - it seems to work well 🙂
Sarah says
Great tip on centering the yolk! I love our egg molds!
Grace says
Thanks Sarah, I am totally in love with my egg moulds too!
Mama Carmody says
Thanks for the information. I am always admiring the shaped eggs but have wondered how to do it. Now I know. I'm going to pin this so I can find the information later.
Peyton says
Great tip on the yolk! I tried shaping an egg with a mould once and it went disastrously (yolk everywhere) and I never tried again. Think I'm going to have another go, following your guide 🙂