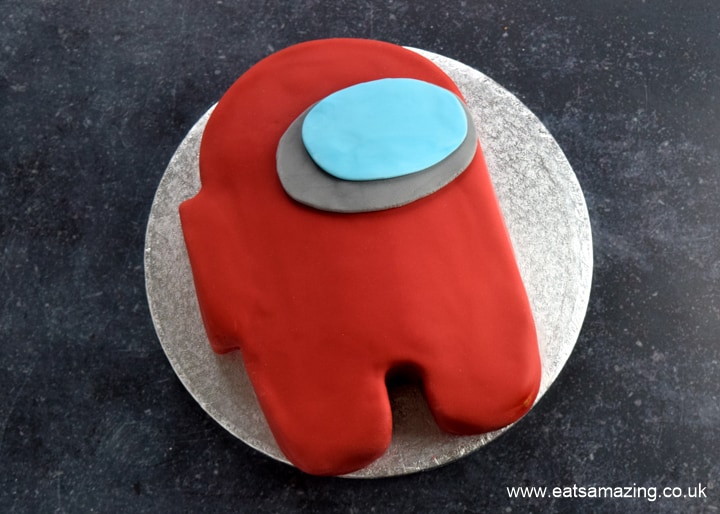
This fun and easy Among Us Cake, shaped like an Among Us crewmate, makes a great birthday cake for any gamer!

Today I have another fun birthday cake idea to add to the collection, this time themed around a character from the video game Among Us.
My boys absolutely love this game and so it wasn't a surprise when my older son requested an Among Us cake for his last birthday! I do love a cake challenge, and fortunately this one proved to be really quite simple, but effective I think!

This easy Among Us cake doesn't require any special tools or cake pans, just a simple rectangular tin and a sharp knife to trim your crewmate into shape.
As well as the main cake, I also took a scoop from the cake mixture to bake a cupcake to go alongside it - this is a clever recent trend which helps avoid having to blow over a cake that will be eaten by several people. Simply bake a matching cupcake to hold the candle(s) and let the birthday child (or adult!) blow out the candle on their very own personalised cupcake.
As you can see in the photo below, I made a crewmate body to go on the cupcake - fans of the game will understand this slightly gruesome sight!

Easy Among Us Cake
Ingredients:
For the cake:
- 300g softened butter
- 300g golden caster sugar
- 6 eggs
- 300g self-raising flour
- 1 Tbsp vanilla extract
- 2 Tbsp milk
To decorate:
- 150g softened butter
- 300g icing sugar
- 2-3 Tbsp milk
- 1 tsp vanilla extract
- 500g red coloured fondant icing
- 75g white fondant icing
- black and blue food colourings
Method:
Preheat oven to 180°C (Gas mark 4/350°F). Grease and line a 30cm x 20cm (12in x 18in) rectangle cake tin.
Place the butter and caster sugar in a large bowl and whisk together until well combined and fluffy.
Add the eggs, two at a time, whisking after you add each pair. Once the eggs have all been whisked in, add the flour, vanilla extract and milk. Whisk again until fully combined.
Pour the cake mixture into the prepared cake tin. Gently smooth the top down with a spatula, then bake in the pre-heated oven for around 35 minutes, until golden and springy to the touch.
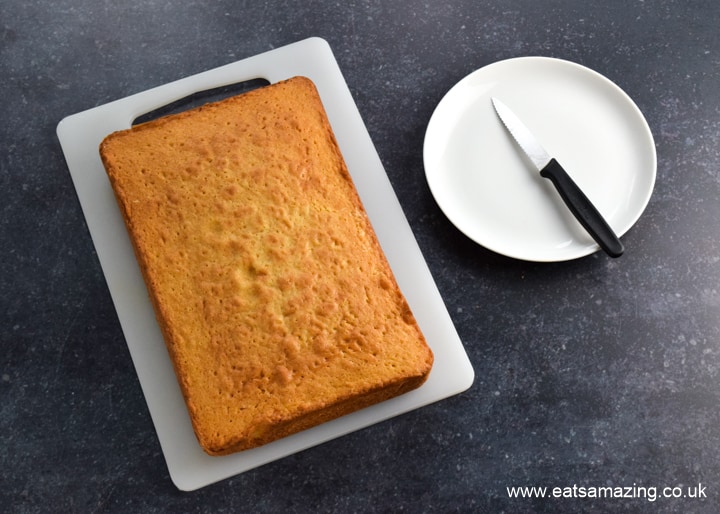
Once the cake is cooked, transfer to a wire rack and leave to cool completely before shaping and icing.
To shape the cake, first use a small side plate as a template to cut a rounded top to the cake.

Place the plate on the cake and cut around it with a sharp knife.

Cut pieces from the base of the cake to shape the two legs.

Use the cake offcuts to make a rectangle for the backpack and pop it on the side of the cake. Don't worry if it doesn't stay put, the buttercream will hold in place once you ice the cake.
Top tip - don't throw away the leftover scrap pieces, save them and use them to make easy chocolate covered cake balls!

Prepare the buttercream icing: Whisk the butter until soft and fluffy. Add the icing sugar, a little at a time, whisking as you go until completely combined. Add the vanilla extract and whisk again until combined. Add milk, 1 Tbsp at at time, until the icing is at the correct consistency for spreading.
Using a palette knife, spread the buttercream all over the top and sides of the cake. Try to get the buttercream as smooth as possible as this will form a base for the fondant.

Once the cake is covered in the buttercream coating, pop it in the fridge or somewhere cool for ½ hour or so to allow the icing to set a little.
Roll the red fondant out into a sheet that is big enough to cover the cake.
Carefully pick the sheet of fondant up (you'll find this easiest to do by rolling it carefully over your rolling pin), then starting at the top end, carefully drape it over the cake.
Gently smooth the fondant in place over the cake. Shape the fondant over any tricky shaped areas by gently pulling it away from the cake and smoothing it down around it. If the fondant breaks around any tricky areas (the space in between the legs cracked a little for me), you can always patch it up with offcuts so don't panic!

Once the fondant is moulded to the cake, cut around the edges to remove any excess and tuck the ends under the cake.
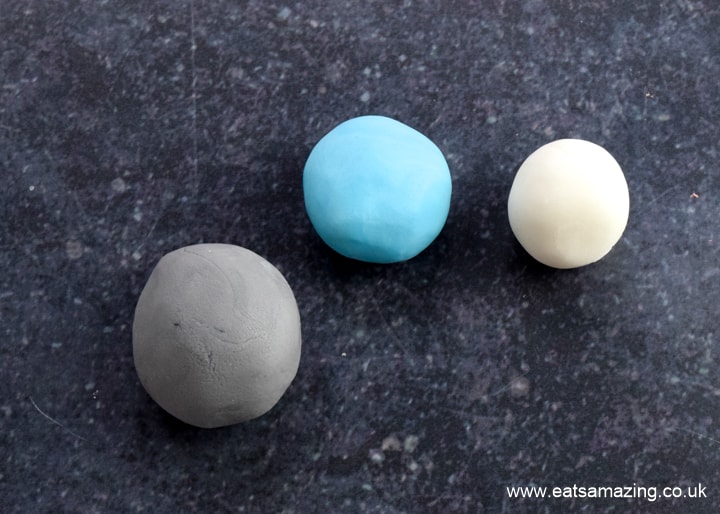
Split the remaining fondant into 3 balls of varying sizes - one big, one medium and one small.
Use gel colourings to colour the largest ball light grey and the medium ball light blue.

Roll the grey fondant out into an oval shape for the visor and place on the cake, sticking it in place with a little water if needed.

Roll the blue icing out into a small oval and add on top of the grey oval.

Repeat with the white icing, rolling into a small oval and layering it on top of the blue oval to complete the visor.

Serve and enjoy!
If you enjoyed this cake recipe, you might also like these fun birthday cake ideas that I've made for my boys over the last few years:


Or check out my easy cakes and cupcakes section for loads more kids cake ideas!
Grace
Easy Among Us Cake
Ingredients
For the cake:
- 300 g softened butter
- 300 g golden caster sugar
- 6 eggs
- 300 g self-raising flour
- 1 Tbsp vanilla extract
- 2 Tbsp milk
To decorate:
- 150 g softened butter
- 300 g icing sugar
- 2-3 Tbsp milk
- 1 tsp vanilla extract
- 500 g red coloured fondant icing
- 75 g white fondant icing
- black and blue food colourings
Instructions
- Preheat oven to 180°C (Gas mark 4/350°F). Grease and line a 30cm x 20cm (12in x 18in) rectangle cake tin.
- Place the butter and caster sugar in a large bowl and whisk together until well combined and fluffy.
- Add the eggs, two at a time, whisking after you add each pair. Once the eggs have all been whisked in, add the flour, vanilla extract and milk. Whisk again until fully combined.
- Pour the cake mixture into the prepared cake tin. Gently smooth the top down with a spatula, then bake in the pre-heated oven for around 35 minutes, until golden and springy to the touch.
- Once the cake is cooked, transfer to a wire rack and leave to cool completely before shaping and icing.
- To shape the cake, first use a small side plate as a template to cut a rounded top to the cake. Place the plate on the cake and cut around it with a sharp knife.
- Cut pieces from the base of the cake to shape the two feet.
- Use the cake offcuts to make a rectangle for the backpack and pop it on the side of the cake. Don't worry if it doesn't stay put, the buttercream will hold in place once you ice the cake.
- Prepare the buttercream icing: Whisk the butter until soft and fluffy. Add the icing sugar, a little at a time, whisking as you go until completely combined. Add the vanilla extract and whisk again until combined. Add milk, 1 Tbsp at at time, until the icing is at the correct consistency for spreading.
- Using a palette knife, spread the buttercream all over the top and sides of the cake. Try to get the buttercream as smooth as possible as this will form a base for the fondant.
- Once the cake is covered in the buttercream coating, pop it in the fridge or somewhere cool for ½ hour or so to allow the icing to set a little.
- Roll the red fondant out into a sheet that is big enough to cover the cake.
- Carefully pick the sheet of fondant up (you'll find this easiest to do by rolling it carefully over your rolling pin), then starting at the top end, carefully drape it over the cake.
- Gently smooth the fondant in place over the cake. Shape the fondant over any tricky shaped areas by gently pulling it away from the cake and smoothing it down around it. If the fondant breaks around any tricky areas (the space between the legs cracked a little for me), you can always patch it up with offcuts so don't panic!
- Once the fondant is moulded to the cake, cut around the edges to remove any excess and tuck the ends under the cake.
- Split the remaining fondant into 3 balls of varying sizes - one big, one medium and one small.
- Use gel colourings to colour the largest ball light grey and the medium ball light blue.
- Roll the grey fondant out into an oval shape for the visor and place on the cake, sticking it in place with a little water if needed.
- Roll the blue icing out into a small oval and add on top of the grey oval.
- Repeat with the white icing, rolling into a small oval and layering it on top of the blue oval to complete the visor.
Love this fun cake idea? Why not save this post to Pinterest so you can easily find it again!


Sussy Imposter3 says
RED VENTED!