

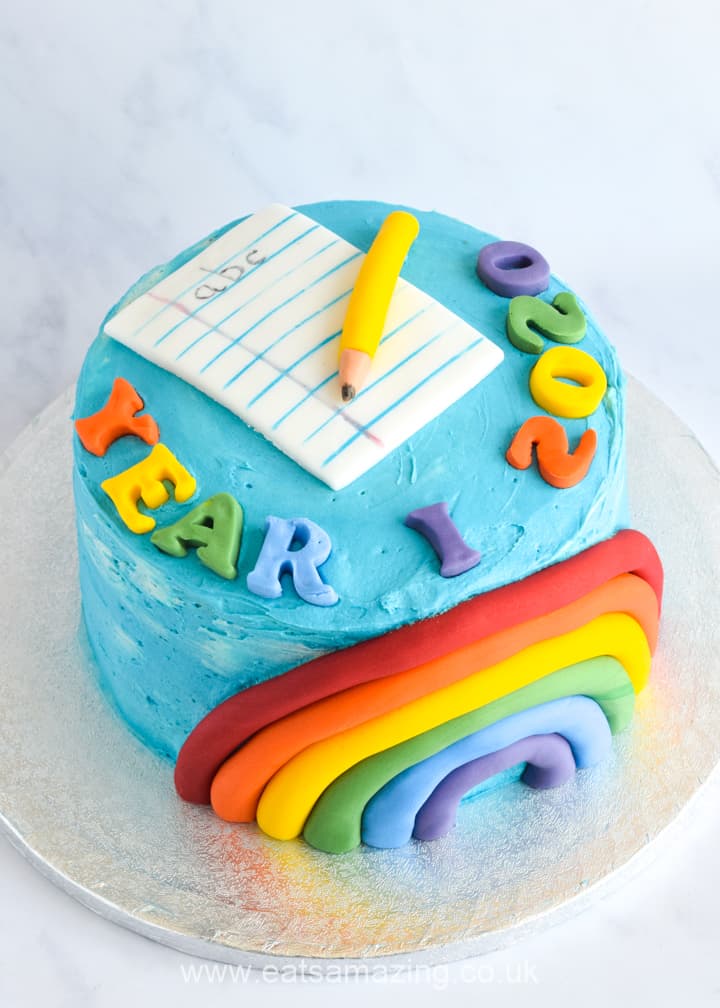
Make this cute and easy cake to celebrate the end of the school year in style! With edible pencil and paper and a gorgeous fondant rainbow on the side!
Today I'm sharing a super cute cake that I made recently to celebrate the end of the school year. And what a strange school year it has been! My youngest went back to school in the middle of June for a few weeks and he was SO happy to have the chance to see his friends again!
We celebrated the end of the school year with a socially distanced picnic for his year group in our local park and I thought a cake would be just the thing to make it a little bit more special.
I decided to make this cake at the last minute so it had to be quick and easy to pull together. As with the Easy Pirate Themed Cake that I made last year, I used a simple three layer Victoria sponge recipe to make a nice tall cake.

I thought a rainbow would be very appropriate for this cake, as it's been a symbol of hope for so many this year, particularly the children, so I coated the cake in blue and white buttercream to represent the sky, and added a gorgeous fondant rainbow to the side.
I decorated the top of the cake with a fondant pencil and paper, and added lettering spelling out 'Year 1 2020'. It was a big hit with all of his friends and every crumb was gone by the end of the picnic!

End of the School Year Cake
Ingredients:
For the cake:
- 300g butter (softened)
- 300g golden caster sugar
- 6 eggs
- 300g self-raising flour
- 1 ½ tsp baking powder
- 3 Tbsp milk
- 2 tsp vanilla extract
For the buttercream:
- 375g butter
- 750g icing sugar
- 1 Tbsp vanilla extract
- blue gel food colouring
For the fondant decorations:
- white fondant icing
- gel food colourings
- black, blue and pink edible writing pens
Method:
Make the fondant decorations
Before you start baking, make the fondant decorations to go on top of the cake. This will give them some time to dry out before you use them.
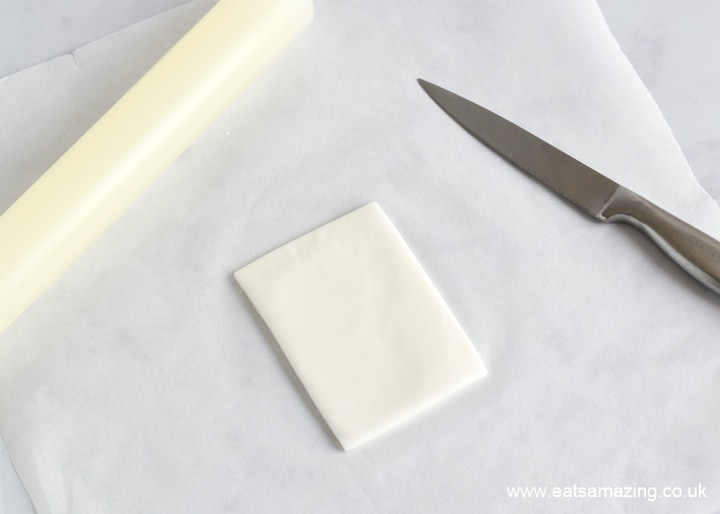
Roll out white fondant and cut into a rectangle for the paper.
Colour a piece of fondant yellow and roll into an even snake shape for the pencil. Cut the ends off with a sharp knife. Colour a small piece of fondant light orange and roll into a cone for the pencil tip. Attach to the rolled out yellow piece with a tiny dash of water. Colour in the tip with a black edible marker pen and add a dot at the other end for the pencil lead.

Colour fondant in rainbow colours, roll out thickly and cut out letters to add a message to your cake. I wrote 'YEAR 1 2020' on my cake. (note: I used the leftover fondant from making the fondant rainbow for the letters. If you aren't adding a rainbow to the side of your cake, you can of course just use one or two colours of your choice for the lettering).
Leave all your fondant toppers on a piece of baking paper somewhere well ventilated to dry.
Make the cake
Preheat oven to 190°C (Gas mark 5/375°F). Grease and line the base of 3 x 20cm round cake tins (shallow sandwich tins are ideal).
Place the butter and caster sugar in a large bowl and whisk together until well combined and fluffy.

Add the six eggs, two at a time, whisking after you add each pair.

Once the eggs have all been whisked in, add the flour, baking powder, milk and vanilla. Whisk again until fully combined.
Divide the mixture between the 3 tins, gently smoothing the tops down with a spatula.
Bake in the pre-heated oven for around 20 minutes, until the cakes are golden and springy to the touch.
Turn the cakes out onto cooling racks and leave to cool completely before icing.
Make the buttercream
Whilst the cakes are cooling, prepare the buttercream icing.
Whisk the butter until soft and fluffy. Add the icing sugar, a little at a time, whisking as you go until completely combined. Add the vanilla extract and whisk again until combined.

Remove approx 300g of the buttercream icing and pop it into a separate bowl – this will be used to fill the cake.
Remove another 300g of the icing – this will be used for the crumb coating.
Colour three quarters of the remaining icing light blue and leave the remaining ¼ plain white.
When ready to assemble, secure one of the cakes onto a cake board with a little of the buttercream icing.
Spread over half of the buttercream icing you set aside for filling. Add a second cake and repeat the buttercream filling, then top with the third and final cake.
Using a palate knife, spread the buttercream that you set aside for the crumb coating all over the cake. If you have a cake turntable, this will really help you to get an even coat. Spinning the cake slowly, use a large cake scraper to even out the sides.
Once the cake is covered in the crumb coating, dab small amounts of blue and white icing all over the cake, until the whole cake is covered in blue and white buttercream. Using the cake scraper, smooth the icing until roughly even and blended together. Bear in mind you’re going for a cloudy sky effect so it doesn’t have to be perfectly smooth.

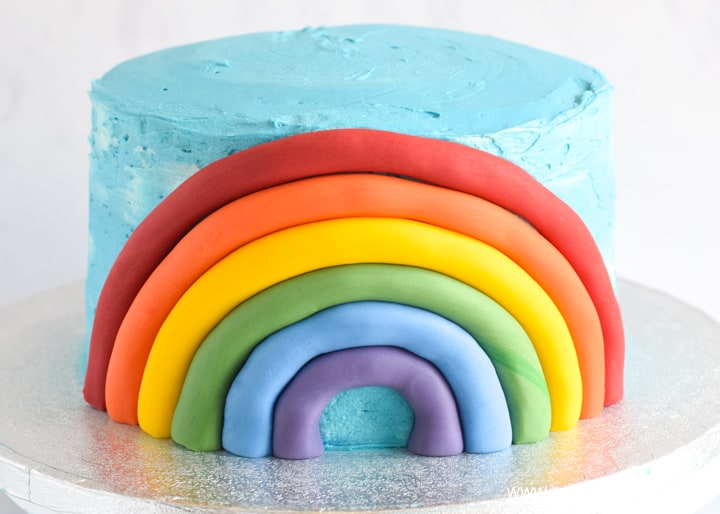
Decorate the cake with the fondant rainbow (see my fondant rainbow tutorial for full instructions).
Add the lettering around the edges of the top of the cake.

Using the edible marker pens, decorate the white rectangle of fondant to look like a piece of lined paper, then add it to the top of the cake, along with the fondant pencil you made earlier.

Serve and enjoy!

If you enjoyed this cake recipe, you might also like these fun and easy cake ideas:


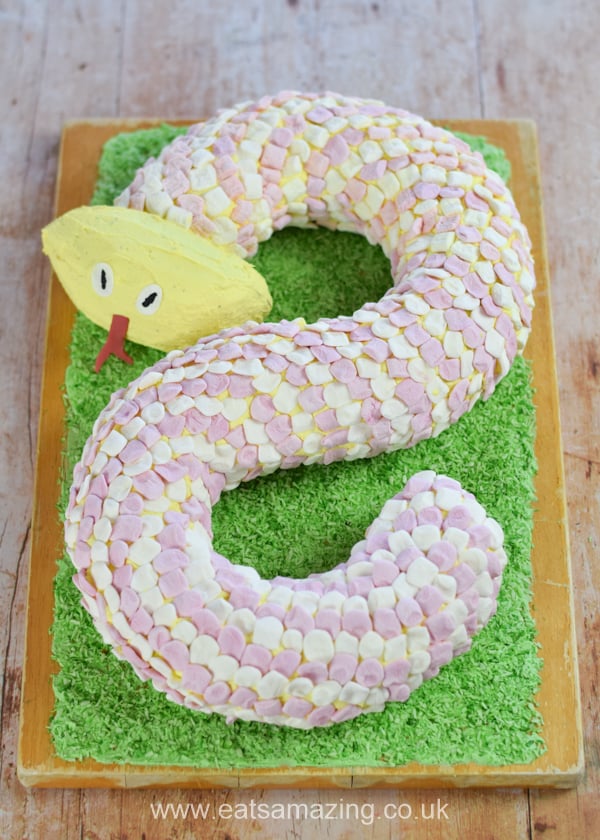

Or check out the cakes and cupcakes for kids section here on the blog for all of our fun cake recipes and easy cake decorating ideas!
Grace

End of the School Year Cake
Ingredients
For the cake:
- 300 g butter softened
- 300 g golden caster sugar
- 6 eggs
- 300 g self-raising flour
- 1 ½ tsp baking powder
- 3 Tbsp milk
- 2 tsp vanilla extract
For the buttercream:
- 375 g butter
- 750 g icing sugar
- 1 Tbsp vanilla extract
- blue gel food colouring
For the fondant decorations:
- white fondant icing
- gel food colourings
- black blue and pink edible writing pens
Instructions
Make the fondant decorations
- Before you start baking, make the fondant decorations to go on top of the cake. This will give them some time to dry out before you use them.
- Roll out white fondant and cut into a rectangle for the paper.
- Colour a piece of fondant yellow and roll into an even snake shape for the pencil. Cut the ends off with a sharp knife. Colour a small piece of fondant light orange and roll into a cone for the pencil tip. Attach to the rolled out yellow piece. Colour in the tip with a black edible marker pen and add a dot at the other end for the pencil lead.
- Colour fondant in rainbow colours, roll out thickly and cut out letters to add a message to your cake. I wrote 'YEAR 1 2020' on my cake. (note: I used the leftover fondant from making the fondant rainbow for the letters. If you aren't adding a rainbow to the side of your cake, you can of course just use one or two colours of your choice for the lettering).
- Leave all your fondant toppers on a piece of baking paper somewhere well ventilated to dry.
Make the cake
- Preheat oven to 190°C (Gas mark 5/375°F). Grease and line the base of 3 x 20cm round cake tins (shallow sandwich tins are ideal).
- Place the butter and caster sugar in a large bowl and whisk together until well combined and fluffy.
- Add the six eggs, two at a time, whisking after you add each pair.
- Once the eggs have all been whisked in, add the flour, baking powder, milk and vanilla. Whisk again until fully combined.
- Divide the mixture between the 3 tins, gently smoothing the tops down with a spatula.
- Bake in the pre-heated oven for around 20 minutes, until the cakes are golden and springy to the touch.
- Turn the cakes out onto cooling racks and leave to cool completely before icing.
Make the buttercream
- Whilst the cakes are cooling, prepare the buttercream icing.
- Whisk the butter until soft and fluffy. Add the icing sugar, a little at a time, whisking as you go until completely combined. Add the vanilla extract and whisk again until combined.
- Remove approx 300g of the buttercream icing and pop it into a separate bowl – this will be used to fill the cake.
- Remove another 300g of the icing – this will be used for the crumb coating.
- Colour three quarters of the remaining icing light blue and leave the remaining ¼ plain white.
- When ready to assemble, secure one of the cakes onto a cake board with a little of the buttercream icing.
- Spread over half of the buttercream icing you set aside for filling. Add a second cake and repeat the buttercream filling, then top with the third and final cake.
- Using a palate knife, spread the buttercream that you set aside for the crumb coating all over the cake. If you have a cake turntable, this will really help you to get an even coat. Spinning the cake slowly, use a large cake scraper to even out the sides.
- Once the cake is covered in the crumb coating, dab small amounts of blue and white icing all over the cake, until the whole cake is covered in blue and white buttercream. Using the cake scraper, smooth the icing until roughly even and blended together. Bear in mind you’re going for a cloudy sky effect so it doesn’t have to be perfectly smooth.
- Decorate the cake with the fondant rainbow (see separate fondant rainbow tutorial for full instructions).
- Add the lettering around the edges of the top of the cake.
- Using the edible marker pens, decorate the white rectangle of fondant to look like a piece of lined paper, then add it to the top of the cake, along with the fondant pencil you made earlier.
Notes
Love this fun and easy cake idea? Why not save this post to Pinterest so you can easily find it again!

Leave a Reply