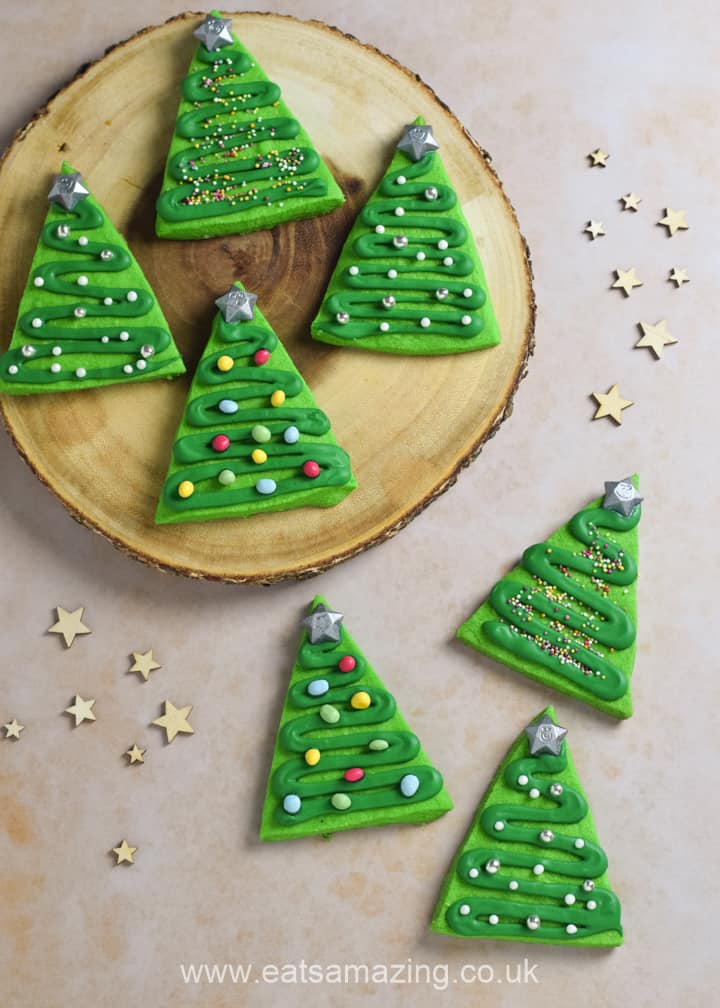
These cute and easy shortbread Christmas tree cookies are perfect for baking with kids - enjoy these yummy Christmas cookies for a fun festive treat at home or pack them up to give as gifts!

Christmas is just around the corner, and this year Christmas baking is more popular than ever! With so many of us spending Christmas apart from our families this year, there's never been a better time to whip up some lovely festive treats to enjoy at home or to send as gifts to family and friends.

With this in mind I've been testing some fun festive Christmas cookie recipes for you, and these cute shortbread Christmas tree cookies are one of my favourites so far.
They're really quick and easy to make, and the simple stylized decorations are simple enough for beginners and experienced bakers alike. The simple triangles of shortbread are decorated with zigzags of icing and lashings of sprinkles - easy peasy!

I used a mixture of sprinkles to decorate my Christmas tree cookies. They're perfect for using up whatever sprinkles you have in the back of a cupboard, or a great excuse to buy some new ones (you can never have too many sprinkles, right?!).
I also topped my cookies with chocolate stars that I sprayed silver with edible lustre. These are optional, but I think they finished the shortbread trees off beautifully, and my boys were very excited about them!

Shortbread Christmas Tree Cookies
Ingredients (makes approx. 16 cookies)
- 250g unsalted butter
- 125g golden caster sugar
- 2 tsp vanilla extract
- green gel food colouring
- 375g plain flour
To decorate:
- 150g icing sugar
- green gel food colouring
- star shaped chocolates (I used Milky Way Magic Stars)
- edible lustre gold or silver spray
- assorted sprinkles of your choice
Method:
Preheat your oven to 160°C (Gas mark 2/325°F). Line 2 baking trays with baking paper.
Pop the butter and sugar into a large mixing bowl, then whisk together with an electric whisk until pale and fluffy.
Add the vanilla extract and green gel food colouring and whisk again until well combined.
Sieve in the flour. Whisk again until the mixture comes together to form a dough (You may need to pull the dough together with your hands as it's quite crumbly).
Roll the dough out on a lightly floured surface to around 1cm thick. Cut a triangle from thick card and use as a template to cut the dough into triangles. My triangles were approx. 10cm x 6cm in size.
Carefully transfer to the baking trays, then bake for around 15 minutes until golden.
After removing from the oven, leave the cookies to cool on the baking trays for at least 10 minutes before transferring to a cooling rack to finish cooling. Be careful, these cookies are very soft and crumbly whilst still warm.

Whilst the cookies are cooling, pop the chocolate stars onto a piece of baking paper and spray generously with the edible gold or silver lustre. I used silver as I had some left from a previous project, but I think gold would look beautiful too.

Once the cookies are completely cool, make the icing:
Sieve the icing sugar into a bowl then add the food colouring with a splash of water. Stir well until the sugar has dissolved and the icing is completely green. Add a little more water if needed to get the correct consistency of icing – it should be a thick paste suitable for piping.
Spoon the icing into a piping bag with a thin round piping tip (if you don't have a piping tip, just use a disposable piping bag or even a freezer bag, and snip off the tip for piping).
Pipe a zig zag pattern onto each cookie to make a Christmas tree.

Working quickly, top with sprinkles of your choice to decorate. I used mini rainbow chocolate beans, hundreds and thousands and silver and white sugar pearls.

Finish each cookie with a chocolate star, then leave the icing to dry and set.

Once the icing has completely dried, you can store the cookies in an airtight container, layered with baking paper to separate them, until ready to serve.
Enjoy!

If you enjoyed this recipe idea, you might also like these fun festive bakes and makes:
Or for more fun recipes and ideas for the festive season, check out the Christmas Food section here on the Eats Amazing blog or pop over and follow my Christmas Pinterest boards for lots more fun ideas from around the web; Christmas, Cute Christmas Food Ideas and Healthy Christmas Food.
Happy baking!
Grace
Easy Shortbread Christmas Tree Cookies
Ingredients
For the cookies:
- 250 g unsalted butter
- 125 g golden caster sugar
- 2 tsp vanilla extract
- green gel food colouring
- 375 g plain flour
To decorate:
- 150 g icing sugar
- green gel food colouring
- star shaped chocolates I used Milky Way Magic Stars
- edible lustre gold or silver spray
- assorted sprinkles of your choice
Instructions
- Preheat your oven to 160°C (Gas mark 2/325°F). Line 2 baking trays with baking paper.
- Pop the butter and sugar into a large mixing bowl, then whisk together with an electric whisk until pale and fluffy.
- Add the vanilla extract and green gel food colouring and whisk again until well combined.
- Sieve in the flour. Whisk again until the mixture comes together to form a dough (You may need to pull the dough together with your hands as it's quite crumbly).
- Roll the dough out on a lightly floured surface to around 1cm thick. Cut a triangle from thick card and use as a template to cut the dough into triangles. My triangles were approx. 10cm x 6cm in size.
- Carefully transfer to the baking trays, then bake for around 15 minutes until golden.
- After removing from the oven, leave the cookies to cool on the baking trays for at least 10 minutes before transferring to a cooling rack to finish cooling. Be careful, these cookies are very soft and crumbly whilst still warm.
- Whilst the cookies are cooling, pop the chocolate stars onto a piece of baking paper and spray with the edible gold or silver lustre.
- Once the cookies are completely cool, make the icing:
- Sieve the icing sugar into a bowl then add the food colouring with a splash of water. Stir well until the sugar has dissolved and the icing is completely green. Add a little more water if needed to get the correct consistency of icing – it should be a thick paste suitable for piping.
- Spoon the icing into a piping bag with a thin round piping tip (if you don't have a piping tip, just use a disposable piping bag or even a freezer bag, and snip off the tip for piping).
- Pipe a zig zag pattern onto each cookie to make a Christmas tree.
- Working quickly, top with sprinkles of your choice to decorate. I used mini rainbow chocolate beans, hundreds and thousands and silver and white sugar pearls.
- Finish each cookie with a chocolate star, then leave the icing to dry and set.
- Once the icing has completely dried, you can store the cookies in an airtight container, layered with baking paper to separate them, until ready to serve.
Love this fun cookie recipe? Why not save it to Pinterest so you can easily find it again!


Leave a Reply